


YOU’VE GOT MAIL! Remember that? AOL, lol! Now that I'm aging myself, let’s just move on - shall we? In this case it’s Flower Mail!! I love receiving a bouquet of flowers by delivery, except that they die fast. But not this bouquet! It can stand the test of time. Let’s start putting this together!
Supplies:
- Cardstock Warehouse Papers
- Lessebo Colours 83lb: White, Flamingo, Bubblegum, Sunflower, Lime Green
- Sirio Ultra Black
- Colorplan 100lb: Powder Green, Park Green
- Pop-Tone Jellybean Green
- Translucent Vellum 48lb.
- Gold Mirror
- Adhesives
- Bearly Art® Glue
- Foam Tape
- Hot Glue
- FREE SVG Files (click link, then right click to download if file does not auto-download)
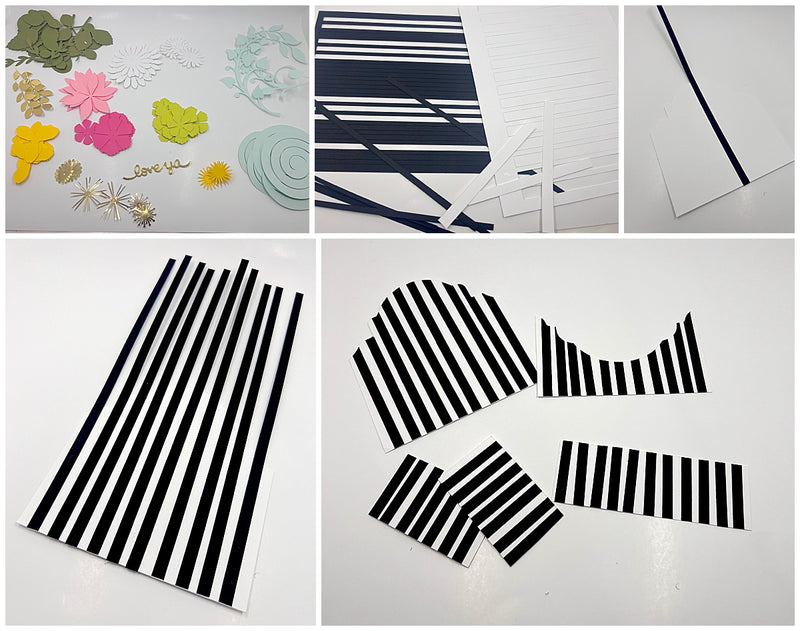
Start by uploading your SVGs into your die cutting machine's software. Find any flower & leaf svg file and dies that you have in your stash and cut those out as well. The more the merrier, and you can use any flowers! I have added some flower options in the SVGs above.
Be sure to convert the score lines in the file before you cut. Not all machines handle score lines the same way, so adjust for your particular machine.
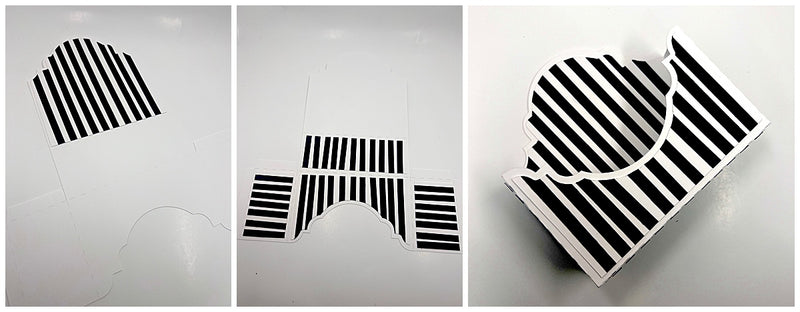
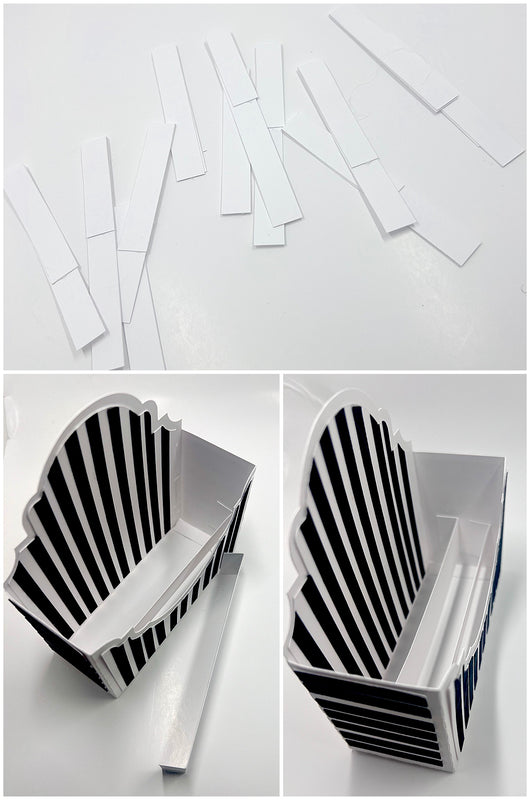
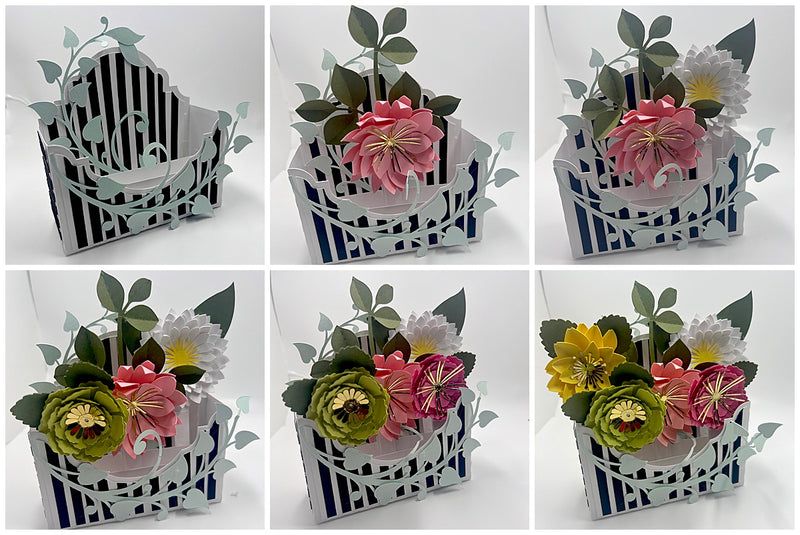
I cut my bases out in white because I wanted to add some sort of a pattern. You should have a base piece, two dividers, and 5 lining panels. I took my stripe SVG file (black and white) and layered those stripes on top of all the panel lining pieces using wet glue. This is an easy way to create a pattern without using patterned paper. I eyeballed my black cardstock lines about a quarter inch apart. Once they were all glued, I took my scissors and cut off the excess
If you prefer, you could also cut your panels out in a different color of solid cardstock, or patterned paper.
This is how all your lining pieces should look once you are done.
Attach all of your lining pieces to your box base inside back, sides, and front. Then, fold the tabs and glue the box together.
Fold your wider white strips, or faux stems, and close them together with hot glue. This is how your flowers will stick to the inside of your box. I folded mine over in varying heights so that I can have some depth on my box card.
Now that your envelope box is together, add the two inside rails that will hold the flowers in the box. Fold over on the tabs on each end and attach them on either side.
Use a bone folder, dowel, or hot glue stick to curl the petals of your flowers and fold all of your floral pieces together. Layer your petals with hot glue, and then attach a leaf to the back of each of the flower. Use hot glue to add the faux stems to each of the flower and leaf combos. This is how you will attach them to the dividers inside the striped box.
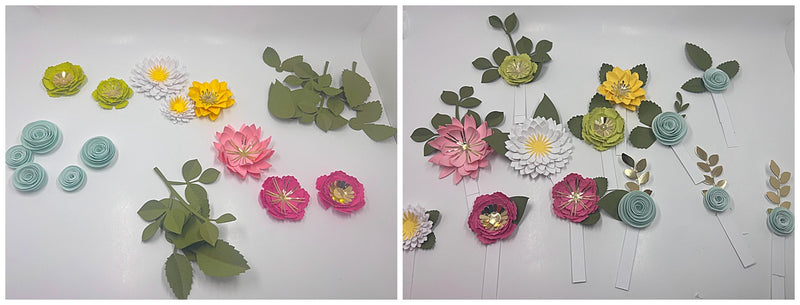
I pulled this leaf spray/vine out of my stash and added one to the back and one to the front for variety. Now you can start adding your flowers and stems to the rails. I started with my biggest flower in the middle and built out from there. Make sure to have some placed higher, lower, to the left, and to the right. The more random, the better. You can also add in more leaves and foliage. Create until your heart's content! There is no wrong way to add your flowers. Whatever you think looks good!
I cut down a little piece of Vellum and added a page flag cut on the end. I die cut “love ya” from a set that I had in my stash. I added a few flat back pearls for decoration and voilà, you’re done!
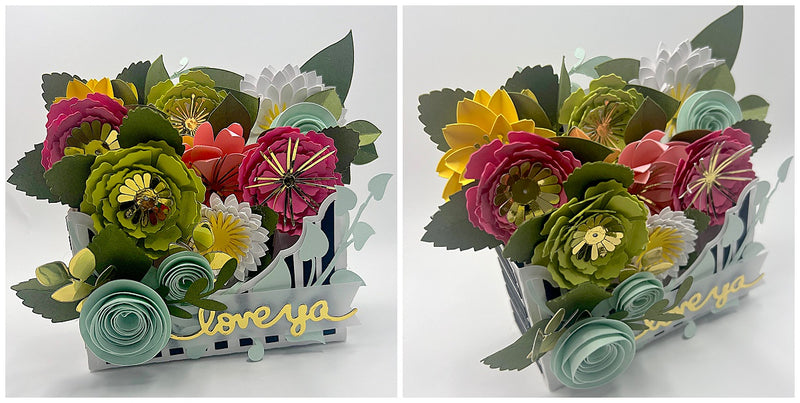
So, what do you think? Will you try this at home? Trust me, these flowers never die and they also will make someone smile very big! This is a great gift for Mother’s Day, a birthday, or any event where you want to send Smile Mail. It was fun to put this envelope flower box together with you guys! As always, thanks for stopping by, I appreciate you!
If you are super fancy - tag us in your creations on Facebook or Instagram. You can use the hashtag #cardstockwarehouse to be featured on our page!